Are you tired of dealing with pesky leaks in your RV roof? Look no further! This article will guide you through successfully repairing your RV roof.
You’ll learn how to assess the damage, identify the different types of roof materials, and gather the necessary tools and materials for the job.
Follow our step-by-step repair guide and discover the importance of preventative maintenance. Say goodbye to leaks and hello to a watertight RV roof!
Assessing Roof Damage
When assessing roof damage, there are a few key points to remember.
First, look for signs such as missing or damaged shingles, leaks, or sagging areas.
During your inspection, always prioritize safety by using proper equipment like a sturdy ladder and wearing protective gear.
If you’re unsure about the extent of the damage or how to repair it, it’s best to seek professional assessment to ensure the job is done correctly and safely.
Signs of Roof Damage
If you notice any cracks or discoloration on your RV roof, it’s time to assess for signs of damage. Assessing damage is crucial to prevent further issues and costly repairs.
Common causes of roof damage include harsh weather conditions, age, and poor maintenance. Early detection is key to addressing problems promptly and avoiding more extensive damage.
Look for signs such as water stains on the ceiling, sagging areas, or loose or missing shingles. If you’re confident in your DIY skills, you can attempt small repairs like sealing cracks or replacing damaged shingles. However, for more significant damage or if you’re unsure, it’s best to seek professional assistance.
They have the expertise and tools to fix your RV roof effectively and ensure it stays leak-free.
Safety Precautions During Inspection
Inspecting your RV roof for signs of damage is essential to ensure safety. Before you begin the roof inspection process, it is important to follow certain safety measures.
Firstly, wear the appropriate protective gear, such as gloves, safety goggles, and sturdy shoes. This will protect you from any potential hazards.
Secondly, adhere to safety guidelines by working on a stable surface and using a secured ladder.
When inspecting the roof, use an inspection checklist to ensure you cover all areas thoroughly. Look for signs of cracks, leaks, or any other damage that may compromise the integrity of your RV roof.
When to Seek Professional Assessment
You may want to seek a professional assessment if you are unsure about the severity of any damage found during your RV roof inspection. Recognizing signs of roof damage can be challenging, and it’s important to have the expertise to assess the situation accurately.
While DIY repairs can be tempting, there are potential risks involved. A professional assessment ensures that all issues are identified and addressed properly, reducing the risk of further damage and possible leaks. Additionally, professionals have the experience and knowledge to recommend the most effective and long-lasting repair solutions.
While there may be a cost associated with professional assessment and repairs, it is important to consider the potential cost savings in the long run. Investing in professional expertise can help prevent costly future repairs and extend the lifespan of your RV roof.
Types of RV Roof Materials
When choosing the right roof material for your RV, you have a few options.
Rubber roofs, such as EPDM and TPO, are popular choices due to their durability and resistance to UV rays.
Metal roofs, including aluminum and steel, offer a sleek look and excellent protection against the elements.
Lastly, fiberglass roofs are known for their lightweight nature and resistance to cracking.
It’s important to match your repair materials to your specific roof type to ensure a successful and long-lasting fix.
Rubber (EPDM and TPO)
To properly repair your RV roof, start by assessing the condition of the rubber material, such as EPDM or TPO. EPDM installation is a popular choice for RV roofs due to its durability and ease of maintenance. TPO, on the other hand, requires regular maintenance to ensure its longevity.
The lifespan of rubber roofs can vary, but with proper care and maintenance, they can last up to 20 years or more. If you notice small punctures or tears in your rubber roof, they can be easily repaired using a rubber roof patch kit.
The benefits of rubber roofing include its ability to withstand extreme weather conditions, its flexibility to accommodate the movement of the RV and its excellent water resistance properties.
Metal (Aluminum and Steel)
The lifespan of metal roofs, including aluminum and steel, can vary depending on the level of maintenance and care they receive. Assessing repairs and addressing common issues promptly is crucial to ensuring the longevity of your metal roof. Regular maintenance is key to preventing major problems and extending the roof’s durability.
Here are some maintenance tips to keep in mind:
- Inspect the roof regularly for any signs of damage, such as rust or loose screws, and address them promptly.
- Clean the roof regularly to remove debris and prevent corrosion.
- Ensure proper drainage to avoid water buildup.
When comparing the durability of metal roofs, aluminum tends to be more corrosion-resistant than steel. Additionally, cost considerations may influence your choice, as aluminum roofs usually come at a higher price than steel.
Fiberglass
Fiberglass may be a good choice if you want a durable and lightweight roofing option. Fiberglass roofs are known for their strength and resistance to harsh weather conditions.
However, your fiberglass roof may require some maintenance and repairs over time. To keep your roof in top shape, consider using fiberglass roof coatings and regular maintenance.
Fiberglass roof coatings act as a protective layer, preventing leaks and extending the lifespan of your roof. If you encounter any damage, such as cracks or holes, fiberglass repair kits can be used to reinforce and repair the affected areas. These kits typically come with all the necessary materials and instructions to make the repair process easier.
Regular maintenance and prompt repairs will help ensure that your fiberglass roof remains strong, durable, and leak-free for years to come.
Matching Repair Materials to Roof Type
Using the right repair materials for your roof type ensures a long-lasting and effective repair. When matching materials to different roof types, it’s important to assess the damage first.
Conduct a thorough inspection of your roof to determine the extent of the problem. Once you have identified the issue, gather the necessary repair tools, such as sealants, caulks, and cleaning supplies, to prepare the surface for repair.
Depending on the severity of the damage, you may need a professional assessment to determine the appropriate roof materials for the job. Remember always to wear personal protective equipment to ensure your safety during the repair process.
Consult a reliable repair guide to ensure you use the correct materials and techniques for a successful repair.
Tools and Materials Needed
When it comes to repairing your RV roof, there are a few key tools and materials that you will need.
Firstly, having common repair tools like a putty knife, a wire brush, and a heat gun will be useful for various repair tasks.
Additionally, selecting sealants, caulks, and tapes is crucial to ensure a proper and long-lasting repair.
Lastly, don’t forget to have cleaning supplies and personal protective equipment (PPE) on hand to keep yourself safe and your RV roof in top shape.
Common Repair Tools
To repair your RV roof, you’ll need a few common tools, such as a putty knife and a caulking gun. These tools are essential for any DIY repair job on your RV roof. When assessing your devices, ensure they are in good condition and suitable.
Proper techniques are crucial to successfully repairing your RV roof. One common mistake is applying too much pressure when using a putty knife, which can damage the roof surface. Remember to use gentle, controlled movements.
Troubleshooting tips can be useful if you encounter any difficulties during the repair process. For example, if the caulking is not adhering properly, clean the surface thoroughly and ensure it is dry before reapplying the caulking.
With the right tools and techniques, you can repair your RV roof effectively and prevent future leaks.
Selection of Sealants, Caulks, and Tapes
The right sealants, caulk, and tapes are essential for effectively sealing your RV roof.
Regarding sealant application, please choose a product specifically designed for RV roofs, as it will provide the necessary protection against weather elements.
When selecting a caulk, opt for a high-quality, flexible caulk that can withstand the movement and vibrations of your RV.
Proper tape usage is also crucial in waterproofing your RV roof. Look for tapes designed for RV roof repairs that have excellent adhesive properties.
Waterproofing techniques are vital to ensure a leak-free roof, so apply the sealant, caulk, and tape correctly and in the right areas.
Cleaning Supplies
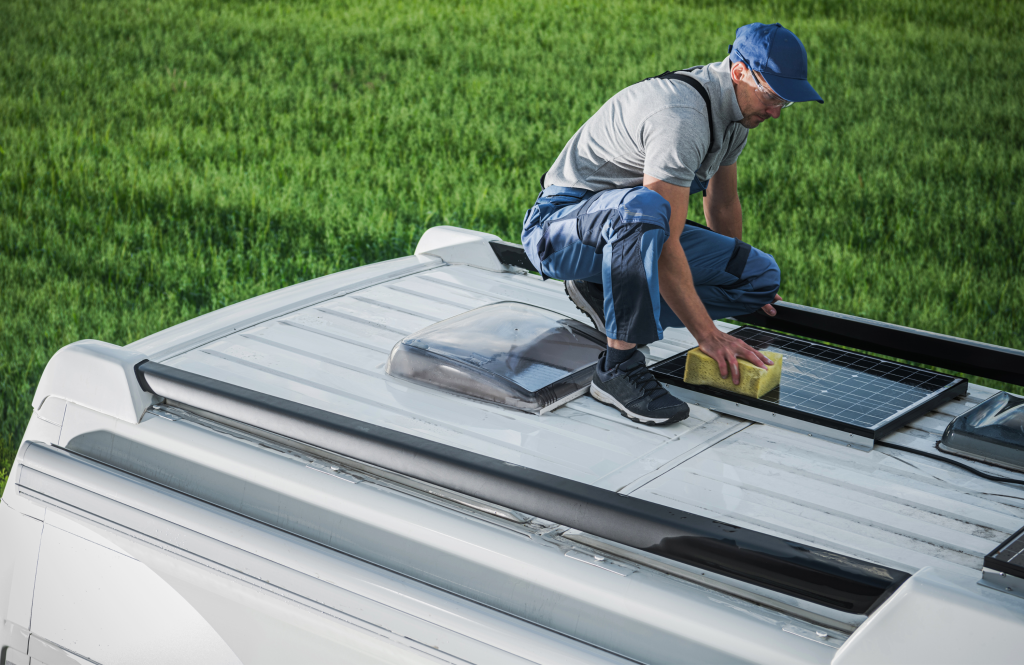
Using the right cleaning supplies is important for maintaining the cleanliness of your RV roof. Regular cleaning is essential to prevent the buildup of dirt, debris, and mold, which can lead to damage and leaks.
To clean your RV roof effectively, use a soft-bristle brush or sponge and a mild cleaning solution. Avoid harsh chemicals that can cause damage to the roof material. Many recommended products are available specifically for RV roof cleaning, such as roof cleaners and protectants.
If you prefer a DIY approach, you can use mild dish soap and water to create your cleaning solution. It is recommended to clean your RV roof at least twice a year or more frequently if you frequently travel in dusty or polluted areas.
Remember to always follow the manufacturer’s instructions and best practices for cleaning and maintaining your RV roof.
Personal Protective Equipment (PPE)
It’s important to wear PPE when cleaning your RV roof to protect yourself from potential hazards.
Ensure you have the right respiratory protection, such as a mask, to shield your lungs from harmful chemicals and dust particles.
Additionally, don’t forget to wear protective clothing, like coveralls or long-sleeved shirts and pants, to prevent any chemicals or debris from coming into contact with your skin.
Safety goggles are crucial to shield your eyes from splashes or debris that could cause injury.
Gloves are essential to protect your hands from chemicals and sharp objects.
Lastly, don’t overlook the importance of hearing protection, especially if you’ll be using loud machinery or tools.
Step-by-Step Repair Guide
When repairing your RV roof, there are several key steps you need to follow.
First, you’ll need to thoroughly clean the affected area, removing any dirt or debris hindering the repair process.
Next, you’ll need to remove any damaged material, ensuring you have a clean and solid surface to work with.
After that, it’s time to apply sealant or caulk, covering any cracks or gaps that could lead to future leaks.
Then, you’ll need to patch and reinforce the area, using appropriate materials and techniques to ensure a durable repair.
Cleaning the Affected Area
Before starting the repair process, thoroughly clean the affected area on your RV roof. Cleaning the area properly is crucial for a successful repair.
Follow these best practices and use the right cleaning techniques to do this.
Start by removing any debris or loose materials from the roof. This could include leaves, twigs, or dirt. Use a soft-bristle brush or a broom to sweep away the debris gently.
Next, mix a mild detergent with water and apply it to the affected area. Using a soft cloth or sponge, gently scrub the surface, avoiding any abrasive materials that could damage the roof.
Rinse the area thoroughly with clean water and let it dry completely before repair.
Taking the time to clean the affected area properly will ensure that the repair is effective and long-lasting.
Removing Damaged Material
After cleaning the affected area, you can start removing the damaged material from your RV roof. To do this, gather the necessary tools, such as a utility knife, putty knife, and pry bar. These tools will help you carefully remove the damaged sections of your roof.
Remember to wear the appropriate safety equipment, such as gloves and goggles, to protect yourself during the process. As you remove the damaged material, dispose of it properly. You can place it in a designated waste container or consult local regulations for disposal guidelines.
Additionally, take note of the repair techniques you used, as this will be helpful for future reference. Properly removing damaged material and taking the necessary precautions can prevent further damage and ensure a successful repair of your RV roof.
Applying Sealant or Caulk
To apply sealant or caulk, you’ll need a caulking gun and the appropriate sealant or caulk for your RV roof. When repairing your RV roof, correctly applying the sealant or caulk is essential to prevent leaks and further damage.
To ensure a successful application, clean the area thoroughly and remove any old sealant or caulk. Next, load the caulking gun with the glue or caulk and apply a steady and even bead along the damaged area. Make sure to cover all cracks and seams completely. Avoid using too much pressure, which can cause the sealant or caulk to spread unevenly.
After applying, smooth the sealant or caulk with a putty knife for a neat finish. Remember to check for any missed spots or gaps and fill them accordingly. It’s important to follow these best practices to avoid common mistakes, such as using the wrong sealant or caulk or applying it too thin.
If you encounter any issues, troubleshoot by checking for proper adhesion and reapplying as needed. For product recommendations, choose a high-quality sealant or caulk specifically designed for RV roofs, such as Dicor or EternaBond. These products are known for their durability and long-lasting performance.
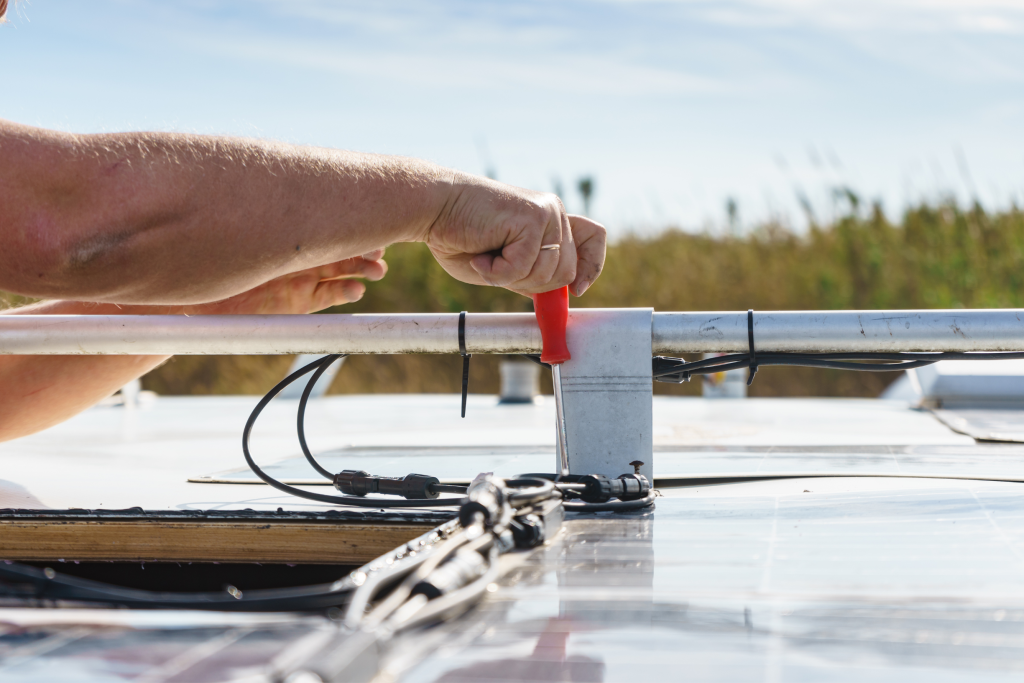
Patching and Reinforcing
Patching and reinforcing the damaged area is crucial for preventing further issues with your RV roof. When troubleshooting leaks and ensuring long-term durability, using the right reinforcing techniques and patching materials is important.
Start by identifying the source of the leak and clean the area thoroughly. For small holes or cracks, you can use a patching material like roof sealant or tape specifically designed for RV roofs. Apply it generously, making sure to cover the damaged area completely.
For larger damages, consider using reinforcing techniques such as adding an extra layer of roof coating or installing a patch kit.
Regular maintenance, such as inspecting your roof for any signs of damage and promptly addressing leaks, is also crucial for ensuring the longevity of your RV roof.
Curing and Testing for Leaks
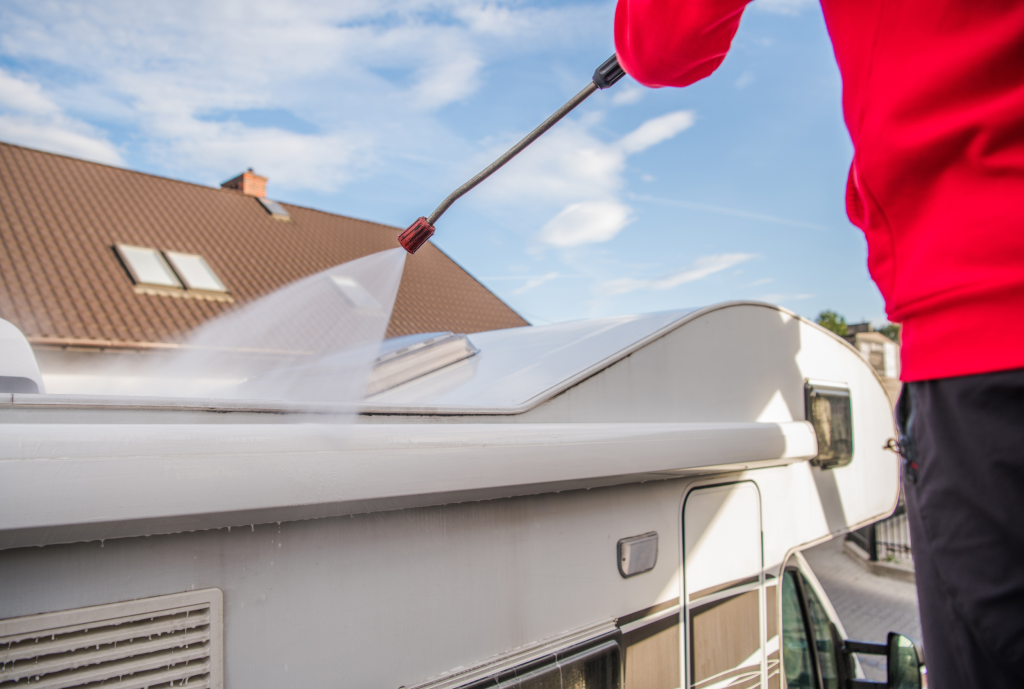
When curing and testing for leaks, it’s important to use a water hose to simulate rain and thoroughly examine the roof for any signs of water seepage. This is one of the most important testing methods for leak detection.
By spraying water on different roof sections, you can identify areas where water may be seeping through. Pay close attention to any signs of water entering the RV, such as drips or stains on the ceiling or walls.
Once you have located the leaks, you can proceed with DIY repairs. It’s crucial to use appropriate waterproofing techniques to ensure a long-lasting fix.
Regular roof maintenance is key to preventing leaks, so check your RV roof regularly for any signs of damage or wear and promptly address them.
Preventative Maintenance and Care
When it comes to maintaining and caring for your RV, there are several key points to keep in mind.
Regular inspections are essential to catch any issues before they become major problems.
Cleaning and sealing tips will help protect your RV from the elements and extend its lifespan.
Avoiding common mistakes and implementing seasonal care and protection measures will ensure that your RV stays in top condition for years to come.
Regular Inspections
Regular inspections are essential for maintaining the integrity of your RV roof. By conducting regular inspections, you can ensure that any potential issues are identified early on, allowing for prompt roof maintenance and preventing leaks.
Early detection is key to avoiding costly repairs down the line. During your inspections, be thorough and look for any signs of damage or wear and tear, such as cracks, bubbles, or discoloration. Pay close attention to seams, vents, and any areas where water may pool.
By inspecting your roof regularly, you can catch any problems before they escalate and take the necessary steps to keep your roof in good condition.
Cleaning and Sealing Tips
Now that you’ve learned the importance of regular inspections for your RV roof let’s move on to some cleaning and sealing tips that will help you prevent leaks and ensure your roof’s longevity.
Cleaning your roof regularly is crucial for maintaining its condition. Use a mild detergent and a soft brush to remove dirt and debris. Be gentle to avoid damaging the roof’s surface.
After cleaning, it’s time to seal any cracks or gaps that may allow water to seep through. Apply an RV roof sealant using a brush or roller, covering all vulnerable areas. Remember to follow the manufacturer’s instructions for proper application.
Avoiding Common Mistakes
To keep your roof in good condition, it’s important to be aware of common mistakes to avoid. One of the biggest repair pitfalls is neglecting preventative measures. Regularly inspecting your roof and addressing any issues promptly can save you from larger problems down the line.
Another mistake to avoid is using improper materials or techniques. Make sure to use the right materials for your specific roof type and follow the manufacturer’s instructions for successful strategies.
Lastly, rushing through the repair process can lead to shoddy artistry. Take your time and ensure that all repairs are done correctly to prevent future leaks.
Seasonal Care and Protection
It’s important to properly care for and protect your RV roof during different seasons to prevent damage. Regular roof maintenance is key to extending the lifespan of your RV and avoiding costly repairs.
Start by inspecting your roof for any signs of damage, such as cracks or leaks. If you notice any cracks, it’s crucial to address them promptly to prevent further damage. Use waterproofing techniques, such as a sealant or roof coating, to protect your roof from water damage.
Additionally, protecting your RV against weather damage is essential. Remove snow and ice buildup during winter to prevent excessive weight and potential leaks. In the summer, use UV protectant products to shield your roof from harmful sun rays.
When to Call a Professional
When assessing the severity of damage to your RV, it’s important to know your limitations in DIY repairs. While some issues may be minor and easily fixable, others may require the expertise of a professional.
Finding trusted RV repair professionals who can accurately assess the damage and provide reliable repairs is crucial for ensuring the longevity and safety of your vehicle. Understanding the associated costs and warranties can help you make informed decisions about when to call in the experts.
Assessing the Severity of Damage
The severity of damage can be assessed by examining the extent of leaks and inspecting the condition of the RV roof. Regarding severity assessment, it’s important to determine whether you can tackle the repairs yourself or if it’s best to call a professional.
Repair techniques will vary depending on the severity of the damage, with minor leaks often being fixed using DIY methods such as sealants or patches. However, it’s advisable to seek professional help to ensure the repairs are done correctly for more extensive damage.
Consider your time and budget constraints when making this decision. While DIY repairs may save money, professional repairs often offer long-term durability and peace of mind.
Recognizing Limitations in DIY Repairs
Recognizing the limitations in DIY repairs can help you avoid potential mistakes and ensure the safety and functionality of your RV. While taking on all repairs yourself may be tempting, it is important to understand the challenges that DIY repairs can present.
One of the main DIY limitations is the lack of expertise and experience. Repairing an RV roof requires specific knowledge and skills beyond your capabilities. Additionally, undertaking complex repairs without expert assistance can lead to further damage and costly repairs in the long run.
Conducting a risk assessment before attempting any DIY repairs is essential to determine if the task is within your abilities. By acknowledging these limitations and seeking professional help when necessary, you can increase your chances of DIY success while maintaining the integrity of your RV.
Finding Trusted RV Repair Professionals
To find trusted RV repair professionals, you can ask fellow RV owners for recommendations or read online reviews to ensure you receive quality service. While DIY RV repairs can have their benefits, there are times when seeking professional help is necessary.
Consider getting multiple quotes and comparing prices when searching for affordable RV repair services. Don’t forget to inquire about warranties and guarantees for the work done.
Regular roof maintenance is crucial for preventing leaks and extending the lifespan of your RV roof. Inspect your roof regularly for any signs of damage or wear and address them promptly. To avoid common mistakes when repairing your RV roof, follow manufacturer guidelines, use the appropriate materials, and seek professional advice.
Trustworthy RV repair professionals can help you keep your RV in top shape and ensure you can enjoy your adventures without any worries.
Understanding Costs and Warranties
When it comes to understanding costs and warranties for RV repairs, it’s important to ask for multiple quotes and inquire about the coverage provided. Cost considerations play a crucial role in budget planning, so comparing repair options is essential before making a decision.
By obtaining multiple quotes, you can evaluate the long-term benefits and choose the most cost-effective option that fits your budget. Additionally, it’s crucial to understand the warranty coverage offered by different repair professionals. Some may provide comprehensive coverage, while others may only cover specific repairs.
Frequently Asked Questions
How often should I inspect my RV roof for potential leaks or damage?
You should regularly inspect your RV roof to catch leaks or damage early. Regular inspections and proper roof maintenance and prevention tips can save you from costly repairs. Consider a professional review or DIY repairs.
Can I use regular household adhesive or sealant to repair my RV roof?
Using household adhesive on your RV roof is not recommended. There are better alternatives available that have pros and cons. Using household adhesive could lead to potential risks and may not provide a lasting repair.
Are there any special considerations or techniques when repairing a rubber RV roof versus a fiberglass roof?
When repairing a rubber roof versus a fiberglass roof, there are some special considerations. Rubber roofs are more prone to damage but can be fixed with EPDM adhesive and sealant. Steps include cleaning, applying primer, and patching. Avoid using regular household adhesive or glue. Regular maintenance is key for both types.
Is removing the entire damaged section of the RV roof necessary, or can I patch it?
You can choose to either remove the entire damaged section of your RV roof or patch it. Both options have their pros and cons. Consider cost-effectiveness and the need for professional repair.
What are some common signs indicating it’s time to replace the RV roof rather than just repair it?
If you notice extensive damage like multiple leaks, sagging, or a deteriorating roof, it might be time to replace the entire RV roof instead of just patching it. Regular roof inspections can help identify these signs.
Conclusion: Safeguarding Your Home on Wheels
In conclusion, you now have the knowledge and tools to repair your RV roof and prevent future leaks successfully.
By assessing the damage, selecting the appropriate materials, and following the step-by-step repair guide, you can restore your roof to its former glory.
Remember to regularly maintain and care for your roof to avoid further issues.
However, if you ever feel unsure or overwhelmed, don’t hesitate to call a professional and ensure the job is done right.
Happy RVing!