1029, 4024 Elkhart Rd. Ste 26, Goshen, IN 46526
Call Us at 574-505-6246
INTEREST FREE PLAN
| Rated Excellent 4.8/5
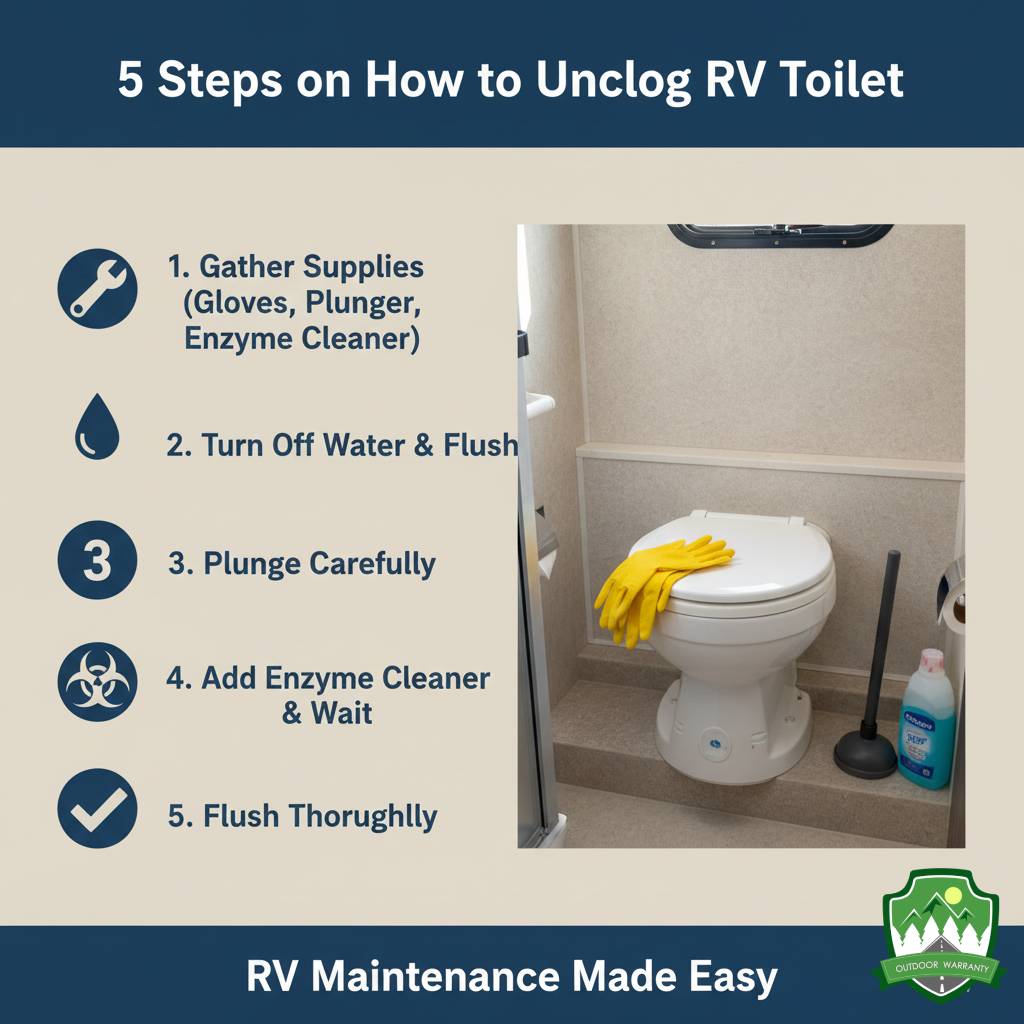
The five steps to unclog an RV Toilet include determining where the clog is, shutting off the water, opening the toilet valve, using a small water hose, and cleaning up afterward. The methods effectively address common blockage issues from excessive toilet paper usage, foreign objects, or improper waste breakdown in RV toilet clogged situations.
Regular maintenance through enzyme treatments prevents buildup, while proper chemical selection remains important, only RV-safe products must contact sanitation systems, as household cleaners damage components. Mechanical solutions like plungers require gentle application to preserve seals, while severe blockages necessitate specialized equipment such as macerators that grind waste into manageable slurry.
Understanding the procedures on “How Do You Unclog a Camper Toilet” saves costly repairs. Comprehensive extended warranty packages cover toilet systems when documentation proves proper maintenance practices preceded any failures.
Determine where the clog is because proper diagnosis saves time and prevents damage to the RV’s black water system. Examining whether waste backs up through the toilet when flushing indicates a blockage in the discharge pipe rather than the bathroom itself. Slow draining suggests partial obstruction requiring a different approach than complete blockages.
The diagnosis involves inspecting three critical areas, the toilet valve mechanism, the discharge pipe, and the holding tank. RV toilets feature specialized foot pedals connected to sliding valves that accumulate debris. Long-handled inspection mirrors help examine pipe interiors, while tank sensors indicate fullness levels. Proper diagnosis determines chemical treatments, mechanical snaking, or professional pumping services become required for resolving plumbing emergencies on the road.
Shut off the water supply because working with dry plumbing prevents messy overflows and protects the RV’s interior from water damage. The procedure involves locating the water pump switch on the monitor panel and toggling it to the “OFF” position, then closing the city water connection valve if hooked up to an external supply.
Recreational vehicles feature a dedicated shut-off valve near the toilet base. A quarter-turn ball valve requires clockwise rotation to close. The process includes depressurizing lines by opening a distant faucet after central supply termination for motorhomes with plumbing systems.
No cleaning materials are required for the preventative step, but keeping absorbent towels nearby helps manage residual water in the lines. Technicians recommend documenting valve positions before manipulation to ensure proper restoration of normal water flow after repairs conclude.
Open the toilet valve because accessing the internal plumbing reveals blockage severity and location in the black water system. Depressing the foot pedal completely exposes the discharge path, while simultaneously allowing insertion of unclogging tools directly into the bowl. Full activation maintains the valve’s open position, providing clear visual assessment of blockage conditions beneath the toilet.
The mechanism operates through a cable-actuated sliding valve located at the base of RV toilet models. Dometic and Thetford toilet designs incorporate specialized flush ball assemblies that separate tank contents from living spaces. Opening requires applying steady pressure on the flush pedal rather than quick presses, holding it down entirely until diagnostics finish.
Experienced RVers place weighted objects on extended pedals for hands-free operation, while addressing stubborn clogs using wand tools or specialized tank cleaning instruments inserted through the opening.
Use a small water hose because pressurized water effectively dislodges waste buildup without damaging delicate RV plumbing components. The flexible rubber hose connects directly to dedicated black tank flush inlets or feeds through the toilet opening when valves remain accessible.
Experienced RVers employ drinking-water-safe hoses measuring ⅜-inch diameter with threaded adaptors for maintenance of sanitation. The procedure requires attaching one end to an external water source while directing the discharge end toward the clog, maintaining moderate pressure to avoid overwhelming the system.
Essential accessories include rubber gloves, hose clamps, and quick-connect fittings that prevent contamination between potable and waste-handling equipment. Owners add environmentally-friendly holding tank treatments containing digestive enzymes through the same hoses, breaking down solid waste while addressing clogs through controlled hydraulic force.
Clean up afterward because proper sanitation prevents contamination spread throughout the RV. Thorough decontamination of all surfaces touched in the unclogging process eliminates harmful bacteria and unpleasant odors in the bathroom area.
The cleanup procedure requires antimicrobial wipes formulated for RV sanitation systems, disposable gloves, and paper towels designated for black water maintenance tasks. RV owners maintain separate cleaning supplies exclusively for toilet repairs, storing them away from kitchen items.
The process includes wiping down toilet bowl exteriors, surrounding floor areas, and any tools used in the operation. Owners follow cleaning with specialized RV toilet bowl treatments containing lubricants that maintain rubber seals while preventing future waste buildup along discharge paths.
Yes, you can use a plunger on an RV toilet, but executing the technique requires modifications compared to residential plumbing. Standard household plungers apply excessive force, damaging the specialized valve systems to RV sanitation equipment.
The primary risk involves compromising rubber seals within the toilet mechanism, in gravity-flush systems where excessive pressure pushes waste backward instead of forward. Damage to the seals results in leaks, incomplete flushing, and expensive repairs, requiring professional service. Experts recommend gentle, slow pressure application rather than forceful thrusts.
Specialized RV toilet snakes or enzymatic holding tank treatments offer safer alternatives for stubborn clogs that are resistant to plunging. The methods work without applying pressure against sensitive components. Marine-style toilets are RV types with macerators and face vulnerability to plunger damage as their grinding mechanisms contain multiple moving parts easily dislodged by pressure surges.
The things that cause the RV toilet to get clogged are listed below.
Too much toilet paper at once creates a blockage in the narrow pipes of an RV toilet. RV waste systems have less water pressure, making it harder to flush large amounts of paper, unlike residential plumbing. Opting for RV-friendly toilet paper that dissolves quickly helps prevent clogs.
Items like baby wipes, paper towels, and feminine hygiene products do not break down in RV black tanks. The materials accumulate over time, creating stubborn blockages that are difficult to remove.
Insufficient water flow prevents waste from moving efficiently through the plumbing system. Solids stick to the tank walls or settle at the bottom if there is insufficient water or low pressure in the flushing. Regularly check the water pump and ensure proper flushing techniques prevent buildup.
Neglecting regular black tank maintenance leads to waste accumulation, which causes blockages and foul odors. Solids harden and form a thick sludge that restricts drainage. Using tank treatments and regularly flushing the tank with clean water helps maintain smooth flow.
Blocked or clogged air vents reduce airflow, making it harder for waste to move through the system. The blocking results in slow drainage, gurgling sounds, and lingering odors inside the RV. Checking the vent stack for debris, such as leaves or nests, ensures proper airflow and prevents blockages.
RV users flush small food scraps, which causes clogs, when grease or fibrous materials are involved. Grease solidifies over time, creating a sticky layer inside the pipes. Food particles attract bacteria, leading to unpleasant odors and potential blockages.
The rubber seal at the toilet’s base prevents waste from sticking and helps control odors. A dried-out seal causes waste to collect around the drain opening instead of flushing smoothly. Regularly adding water and using specialized lubricants keeps the seal functional.
Mineral deposits build up in pipes, narrowing the flow path for waste. Calcium and lime deposits create rough surfaces where toilet paper and solids get stuck. Flushing with soft water or using descaling treatments prevents blockages.
Household cleaners or the wrong type of chemicals in the black tank interfere with waste breakdown. Chemicals kill beneficial bacteria that help break down solids, leading to sludge buildup. Choosing enzyme-based treatments ensures effective waste decomposition without damaging plumbing components.
Dropping items like toothbrushes, wrappers, or plastic debris into the toilet cause immediate blockages. RV toilet plumbing is more sensitive than home systems, making it challenging to remove solid objects once they get stuck.
To use a snake to unclog an RV Toilet, follow the ten steps listed below.
Select a flexible, non-damaging plumbing snake designed for RV waste systems. Avoid metal snakes with sharp edges that scratch or damage the pipes and the black tank.
Turn off the water supply to prevent accidental flushing in the process. Wear gloves and place absorbent towels around the toilet base to catch any spills.
Feed the snake gently into the toilet opening, guiding it down the drain. Push slowly to avoid forcing it through sharp bends that damage the plumbing.
Turn the handle clockwise while applying light pressure to loosen the blockage. Keep rotating until resistance decreases, indicating that the clog is breaking apart.
Extend the snake into the drain if the clog does not clear immediately. Continue turning and maneuvering the snake to help dislodge stubborn waste buildup.
Slowly retract the snake while maintaining rotation to remove any remaining debris. Check for waste buildup on the tool, as it confirms the clog was disrupted.
Turn the water supply back on and flush the toilet multiple times to confirm smooth flow. Repeat the snaking process if water drains slowly or backs up
Rinse the snake with a hose and use a disinfectant to remove waste residue. Allow it to dry completely before storing to prevent odors and bacteria growth.
Use a tank flush system or pour water into the toilet to clear the remaining debris. Adding an RV tank treatment helps prevent future clogs.
Check for signs of buildup or damage in the plumbing system. Regularly using an enzyme-based tank treatment and flushing with adequate water helps prevent future blockages.
No, boiling water cannot unclog an RV toilet because it damages plastic components and rubber seals throughout the black water system. The extreme heat deteriorates valve gaskets, weakens PVC connections, and warps critical sections of the drainage pathway.
Boiling water dissolves organic matter causing minor clogs, warm water (110°F) mixed with specialized RV tank treatments offers a safer alternative that breaks down waste without compromising system integrity. Diagnosing persistent RV clogs ensures effective treatment with tank-specific enzymes, RV-safe snakes, or professional pump-out services. The methods clear blockages without causing costly damage.
To unclog an RV Toilet Holding Tank, follow the ten steps listed below.
Prevent waste buildup by avoiding additional flushes until the clog is cleared. Overloading the tank worsens blockages and increases the risk of backups.
Pour gallons of warm water into the toilet to help loosen solid waste. Avoid boiling water, as extreme heat damages seals, pipes, and tank components.
An enzyme-based or bio-activated tank treatment breaks down waste and toilet paper. Let the solution sit for a few hours or overnight for maximum effectiveness.
Drive the RV around or rock it gently to help dislodge stuck waste inside the tank. Movement enhances the breakdown process and improves drainage.
nsert an RV-safe plumbing snake into the toilet drain and rotate it to break apart stubborn blockages. Slowly pull it out while continuing to turn to clear waste buildup.
Connect a hose to the black tank flush system, fill the toilet with water, and drain it completely. Repeat multiple times until the outflow runs clear.
Flush the toilet and observe water drainage to confirm the clog is gone. Repeat the treatment or use a black tank wand to spray inside.
Mix warm water with a tank cleaner or mild detergent, fill the black tank, and let it sit before flushing. It removes waste residue and prevents future clogs.
Check valves, seals, and vent pipes for blockages or buildup. Regular maintenance, including proper flushing techniques and tank treatments, prevents recurring issues.
Schedule a professional black tank pump-out service, if DIY methods fail. Severe blockages require high-pressure flushing or specialized cleaning equipment.
Yes, you can apply chemicals to unclog an RV toilet. Formulations designed for recreational vehicle waste systems containing bacteria cultures and enzymes that naturally break down organic matter without harming sensitive components.
The specialized treatments dissolve toilet paper, waste, and other biodegradable materials causing blockages while helping restore proper flow throughout the black water system. Harsh household drain cleaners like Drano, Liquid Plumr, or caustic lye products must never enter RV plumbing because they burn plastic pipes, destroy rubber seals, damage holding tank sensors, and void manufacturer warranties on expensive sanitation equipment.
RV-specific products from manufacturers such as Camco, Thetford, and Happy Campers provide effective solutions when applied according to package instructions regarding dosage, timing, and water level requirements. Requiring a few hours or overnight action periods followed by thorough flushing with clean water once blockages dissolve.
The things to prevent your RV toilet from clogging are listed below.
Choose biodegradable, quick-dissolving toilet paper for RV waste systems. It prevents clumps from forming and reduces the risk of blockages.
Hold the flush pedal down longer to ensure waste moves smoothly through the system. Regular flushing prevents waste from sticking to the tank walls.
Use enzyme-based treatments to break down waste and reduce odors. Routine Regular RV Maintenance ensures a clean tank and prevents buildup.
Keep wipes, paper towels, feminine hygiene products, and other non-biodegradable materials out of the toilet.
Pour a small amount of water into the bowl after each use to keep the seal from drying out. Lubricating the seal prevents waste from collecting near the drain opening.
Drain the tank when it is at least two-thirds full to ensure proper waste flow. Flushing too early leaves solid waste behind, leading to clogs.
Use a black tank flush system to remove the remaining waste. Leaving residue inside increases the risk of future blockages.
Ensure the vent stack is debris-free, like leaves or nests. A blocked vent, slow drainage, and pressure issues are created.
Pay attention to weak flushes or slow-emptying tanks as early signs of buildup. Addressing minor issues quickly prevents major clogs.
👉 Call Us 574–505–6246
Let us give you the best quote we can! 👇
You agree to receive automated follow-up, reminder, and promotional messages with varying frequency. Text and data rates may apply. Reply STOP to end. Text HELP for help. Click for Terms of Service and Privacy Policy.